This guide covers horizontal metal band saw blade installation for beginners. If you are new to using a horizontal metal band saw, installing a new band saw blade can look complicated and even a little scary, but with a clear step‑by‑step process it becomes simple and safe.
This guide is written for beginners who use horizontal metal band saws for cutting metal in workshops and factories.
Why Correct Blade Installation Matters
Correct horizontal metal band saw blade installation helps you improve cutting efficiency, extend blade life and reduce downtime. Correct band saw blade installation is not just a basic setup step. It directly affects:
- Cutting efficiency and cycle time
- Blade life and tooth wear
- Cut quality and straightness
- Operator safety and machine reliability
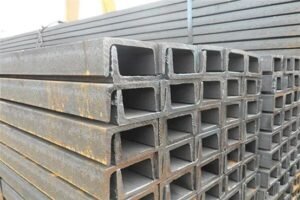
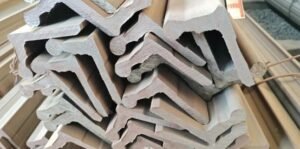
Whether you are cutting structural steel, solid bars, or tubing, starting with a correctly installed blade saves you time and money. If you need help choosing the right blade before installation, see our [bandsaw blade selection guide].
Before You Start: Safety Checklist
Before touching the blade or the saw, follow this safety checklist:
Disconnect the power
- Switch off the machine and isolate the main power supply (lock‑out/tag‑out if required by your site).
Wait until everything stops
- Make sure the previous band saw blade and all moving parts have come to a complete stop before opening any covers.
Wear proper PPE
- Use cut‑resistant gloves, safety glasses, and safety shoes according to your plant safety rules.
Clean the work area
- Keep the floor and saw area dry and free of oil, chips, and other debris to avoid slips and falls.
How to Install a Blade on a Horizontal Metal Band Saw
step 1: Safely Uncoil the Metal Band Saw Blade
New metal cutting band saw blades are usually shipped coiled. Handle them carefully to avoid accidents and tooth damage.
- Hold the coiled blade away from your face and upper body.
- Grip the back of the blade (the edge without teeth) with both hands, then carefully remove the ties and let the blade open into a large loop.
- Slowly uncoil the blade completely, making sure all teeth point in the same direction and do not hit each other.
Step 2: Horizontal Band Saw Blade Installation on the Wheels
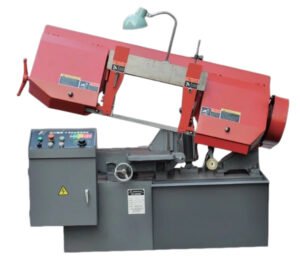
The following steps will walk you through horizontal metal band saw blade installation on a typical metal cutting saw.
The exact design depends on your horizontal metal band saw, but most machines follow the same basic process. Always check your machine manual for specific instructions.
Open wheel covers and guards
- Raise the saw head to a convenient upper position.
- With the machine powered off, open the covers over the drive wheel and idler (driven) wheel, and remove or open any blade guards.
Release blade tension
- Turn the tension handwheel or lever counterclockwise to move the idler wheel towards the drive wheel. This creates enough space to fit the blade over the wheels.
Loosen blade guides
- Loosen the upper and lower blade guides (rollers or guide blocks) slightly so the new blade can pass between them easily.
Fit the blade on the wheels
- Following the normal blade path of your saw, place the blade around the drive wheel first and then around the idler wheel.
- Make sure the blade sits near the center of each wheel and is not twisted or riding on the outer rim.
Route the blade through the guides
- Feed the lower section of the blade between the left and right blade guides.
- The back of the blade should be close to, or lightly touching, the rear guide bearing or backup rollers for proper support.
Step 3: Tension the Blade and Check Tracking
Good blade tension and tracking are essential for straight cuts and long blade life.
Apply tension gradually
- Turn the tension handwheel clockwise to tighten the blade slowly. Do not overtighten in one move.
Rotate the blade by hand
- Turn the drive wheel or motor pulley by hand so the blade makes at least one full rotation.
- Watch how the blade sits on the wheels: it should stay in a stable position near the center and the back of the blade should naturally sit close to the shoulder on each wheel.
Adjust if needed
- If the blade walks to one side, looks like it might come off a wheel, or rubs on any guards, stop and:
- Check blade tension
- Re‑adjust the blade guides
- Confirm the blade is not twisted and is correctly seated on both wheels
Step 4: Make Sure the Tooth Direction Is Correct
Blade tooth direction is a common source of problems for new users of horizontal metal band saws. A blade installed in the wrong direction will not cut properly and can quickly lose teeth.
- In a typical horizontal metal band saw, the workpiece is clamped in the vise and the saw head pivots downward. The blade moves in a continuous loop around the wheels.
- The rule is simple: the teeth must point in the direction the blade is moving when it enters the material.
Practically, for most horizontal saws:
- When you stand at the operator’s position and look at the cutting zone, the blade is usually moving downward and towards the fixed jaw of the vise.
- The tooth tips should lean forward in that same direction, “biting into” the workpiece, not away from it.
Signs that tooth direction is wrong include:
- The blade slides on the material and does not bite.
- The workpiece vibrates or chatters in the vise.
- Teeth chip off quickly and the blade fails early.
If you see any of these symptoms, stop the saw, disconnect power, remove the blade, flip it so the teeth point in the correct direction, and reinstall it.
Step 5: Close Guards and Perform a Test Run
Once the blade is correctly installed and oriented, complete these final checks:
Close and secure all guards
- Re‑install and lock all wheel covers and safety guards before starting the machine.
Adjust blade guides and saw head
- Move the blade guides close to the work area so the blade is well supported, but not touching the material.
- Set the saw head height so there is minimal free travel before the blade reaches the workpiece.
Run the saw with no load
- Restore power and start the saw without a workpiece in the vise.
- Listen and watch for abnormal vibration, knocking, or rubbing. If you notice anything unusual, stop immediately and correct the issue.
Make a test cut
- Clamp a test workpiece, set the correct cutting speed and feed, and make a short test cut.
- Check cut quality and chip shape to confirm that the horizontal band saw blade is cutting smoothly.
Recommendation: Combine This Guide with On‑Site Training
Even with a clear guide, the safest and fastest way for a beginner to learn blade installation is still hands‑on training. We recommend that new operators install the first blade under supervision from the machine supplier or an experienced operator. A live demonstration plus this written procedure helps reduce installation errors, improve blade life, and build good safety habits from day one.
Share this horizontal metal band saw blade installation guide with new operators as part of their basic training.